The Gigatron TTL comes standard with 32Kx8 of 55ns-70ns SRAM, upgrading it to 64Kx8 is trivial and has no negative impact on the Gigatron hardware that I have been able to determine so far in the last couple of days. i.e. It responds as expected and all applications run fine with it installed.
The only caveat is that the SRAM I chose to upgrade to, HM628128LP-7, (128Kx8), draws around 30-40mA more that the original 62256C, this caused my USB voltage from my PC and crap hub to drop by around 0.05V and thus the MPC100-475DI Supervisor started triggering and endlessly rebooting the Program Counter IC's, (161's).
I fixed this by using a dedicated 5V plug pack and a short USB cable, another solution is to replace the MPC475 with a MPC450 which will lower the threshold voltage from 4.75V to 4.5V.
With that out of the way, should you wish to continue, this is how I went about it.
1: Here are 3 pinouts showing you the differences between the standard JEDEC SRAM layout for these devices, (*NOTE*, if you use a more modern device or of a different package format, then you are on your own).
Firstly you should notice that both the 62512, (64Kx8) and 628128, (128Kx8), are both 32pin devices as opposed to the 28pins of the 62256, (32kx8), and thus have 4 extra pins; but because of the JEDEC backwards and forwards compatibility pinouts, you are able to position the new devices so that the pins functionally and electrically line up correctly.
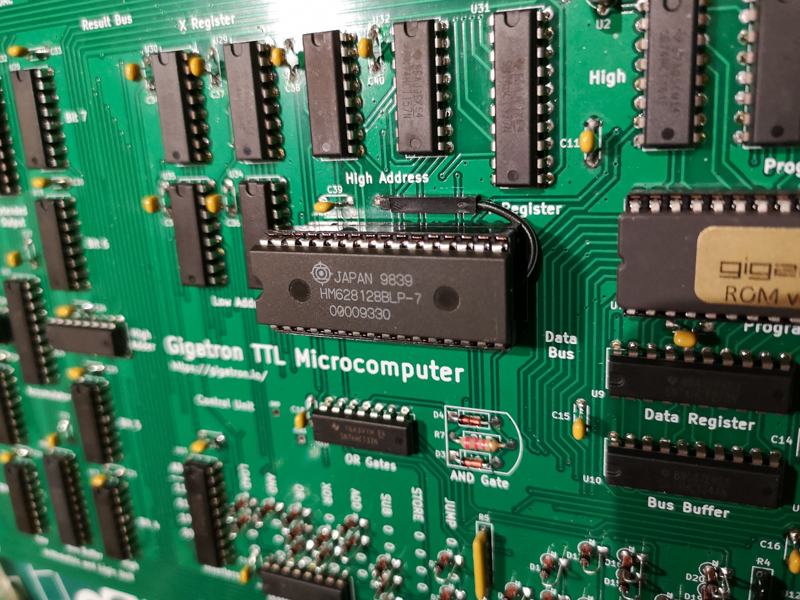
Here you can see my 628128 overhanging the front of the socket by 2 pins on either side, (total of 4 pins). It's crucial that you align the SRAM's correctly, look at the 3 images I posted above and you can see that the common functionality aligns with the bottom of the device.
Grab a spare 32pin socket, (you will be modifying the socket, not the Gigatron or the SRAM), how you modify it depends on whether you have a 64Kx8 or 128Kx8 SRAM.
64Kx8 SRAM:
- 1) You need to link pin32, (VDD), to pin30, (CS2), on the socket using fine gauge single strand wire, (preferably), with a soldering iron. Make sure to not solder to the skinny part of the socket's leg as you will not be able to then insert it into the RAM socket on your Gigatron.
- 2) Turn off your Gigatron and remove all of the cables and peripherals attached to it.
- 3) Solder a pin header, (or some type of single wire connector), to the A15 address line, (labeled as "High Address A15"), on your Gigatron PCB, (it's right next to the RAM chip). This will allow you to plug a single connector into and out of the Gigatron at will. If you don't have a pin header or some sort of connector, then you may directly solder the A15 wire to this location on your Gigatron, but I don't recommend it. It will have no mechanical strength or elasticity and will eventually break or even damage your Gigatron's PCB if fiddled with regularly.
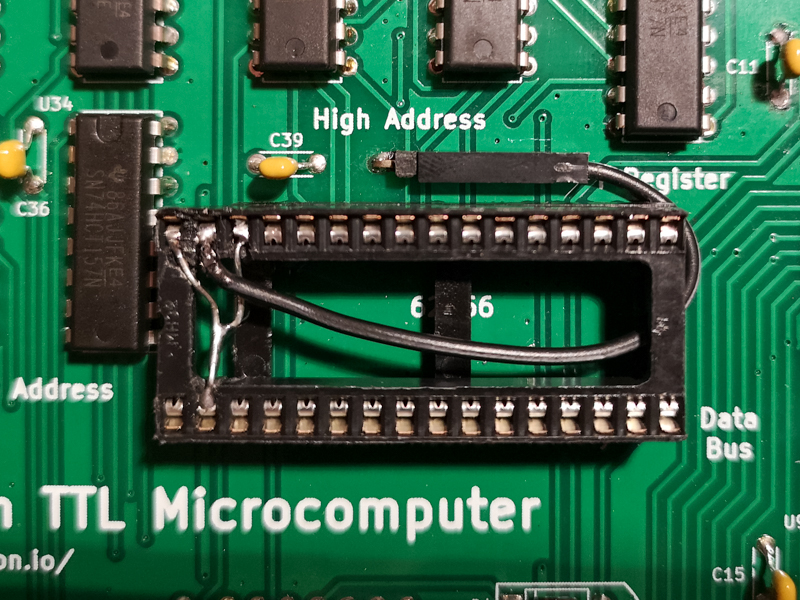
- 4) Solder a wire to pin 31, (A15), on the socket, this wire will connect to the connector/pin header from step 3) and allow the Gigatron's CPU to address the extra bank of 32K RAM.
- 5) Check all your soldering, (all soldering should ONLY have been performed on the 32pin socket, apart from the pin header to the Gigatron).
- 6) Check for shorts between the socket's pins with a multimeter.
- 7) Make sure the Gigatron has NO power; Insert the socket into the Gigatron's socket and check for shorts again with your multimeter, pay attention to the overlap required and make sure it looks like my purple photo from above. Make sure the pins of the socket easily and fully slide into the Gigatron's socket.
- 8) Insert your beefy SRAM and profit.
128kx8 SRAM:
Is exactly the same as above, but if you look at the pinouts, it has an extra pin. A16, (pin2), where the 64Kx8 had a no connection, (NC). This pin needs to be set low or high, (your choice), and can't be left floating. If you set it low, the Gigatron will use the lower bank of 64K of memory of the 128Kx8 SRAM with the upper bank being unused, (vice versa if you set it high).
1.5) Solder a link from pin 2, (A16), to either pin 32, (Vcc), or pin 16, (Vss); in the purple photo above you can see I opted for pin 16, (Vss), with a dodgey bit of wire I found in a breadboard.
That's it, so far in 2 days of testing, no drama or blue smoke, apart from the extra draw on the USB supply and potential Supervisor reset issue, it works great.

